On our 1960 Eichler (as well as all others, as far as I know), the roofing is a few layers (from top to bottom):
• waterproofing: tar and gravel or foam (could be multiple layers of roofing, depending on your house's history.)
• original 1/2" fiberglass insulation, usually crushed by the roof
• in-roof wiring, covered by a metal channel to protect it from roofers
• 2x6 tongue and groove redwood boards
That's it; the redwood boards that hold the roof up are also the boards you see as your ceilings.
To install a skylight, all that's needed is a hole in the roof framed by 2x12 (or whatever) lumber, with the skylight sitting on top. The hole needs to be cut through all the layers of the roofing and needs to avoid any wiring paths, then gets framed with the boards making the "chimney" for the skylight. Your roofer then patches the roofing around the skylight, and brings the roofing up the walls of the skylight's chimney.
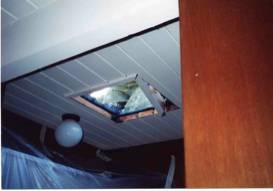
The original Eichler skylights used a specially-milled piece of wood that had a lip cut to hide the edges of the hole. When we had to reframe one of our skylights after a roofing mishap, the roofers used plain, rough 2x12 redwood. I ended up sanding and oiling the redwood after they left so it had a finished appearance, and added some thin 2" wide redwood trim to hide the edges of the hole cut in the ceiling.
Here's some photos of a bare, original roof. These photos were taken when we reroofed our house in 2000. The three photos are:
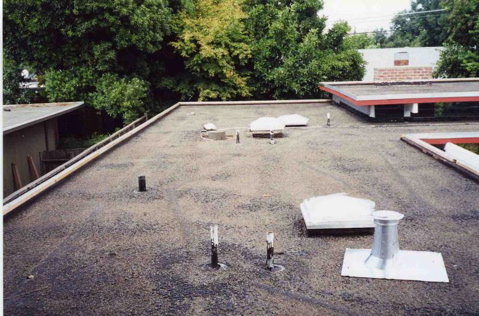
1) overall photo of the roof after the roofers had stripped the roof down to the original tar and gravel. The electrical wires hidden under the roof can be seen as darker stripes across the roof surface. I'm sure this picture will come in handy if I ever decide to put a fan in our guest bathroom and need to figure out where to cut the hole in the roof.
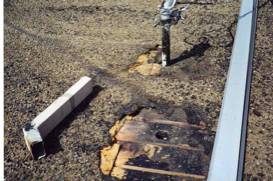
2) Photo of one of the skylight framing being removed. We got caught by a freak rainstorm during the re-roofing, and one of the skylight chimneys cracked as the house dried out. This shows the roofers removing the original wood framing; they replaced it with 2x12 redwood. This shows the ends of the roof boards nicely, and shows how the skylight framing just fits against the boards.
3) Detail photo showing all the layers of roofing -- the original tar-and-gravel surface, the insulation batt underneath it, and the roof boards under all.
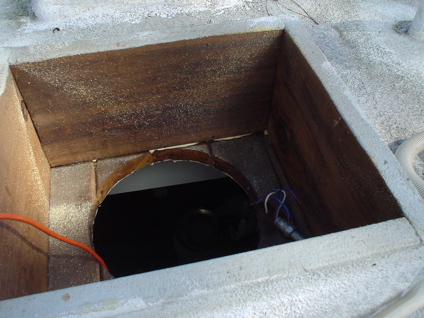
4) This is a typical fan box -- an enclosure on the roof to protect a roof-mounted bathroom fan. The fan is located inside the box, and a metal lid protects it from the elements. Notice that the box has been embedded in the foam roof.